How To Record Videos
You can record video by setting up an automation to record when an event takes place. You can also record live video manually through the American Standard® Home web portal or mobile app.
Record Using Automations
Automations tell your cameras to record when a specific event takes place. This event can be triggered by a motion sensor or camera detecting motion, someone entering your Geofence or unlocking a door, time of day, and many others.
|
NOTE: |
-
Enable motion detection on your camera if you want to use motion detection in an Automation. If motion detection is not enabled, it will not be available as a trigger. NOTE: WCE100/WCW100/WCW200 cameras do not support motion detection. You will need to trigger the recording through some other sensor or device such as the example below or a separate motion sensor, etc.
-
-
- Log into the American Standard Home web portal.
- If you have multiple homes, select the home in which the camera is installed.
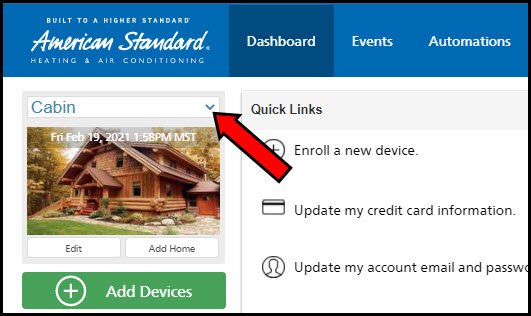
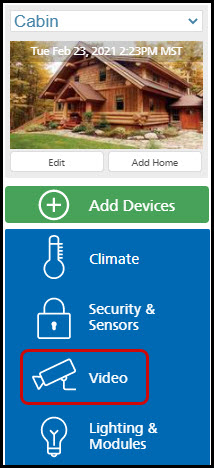
- Select Video from the blue menu on the left side of the page.
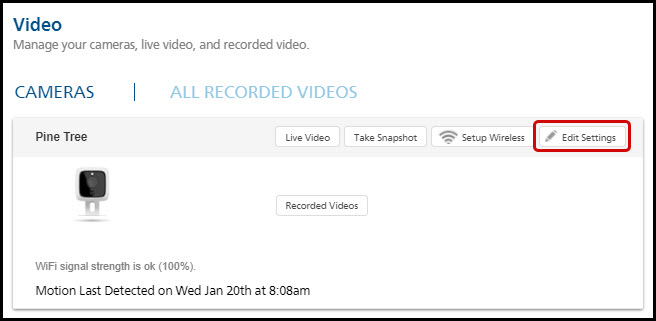
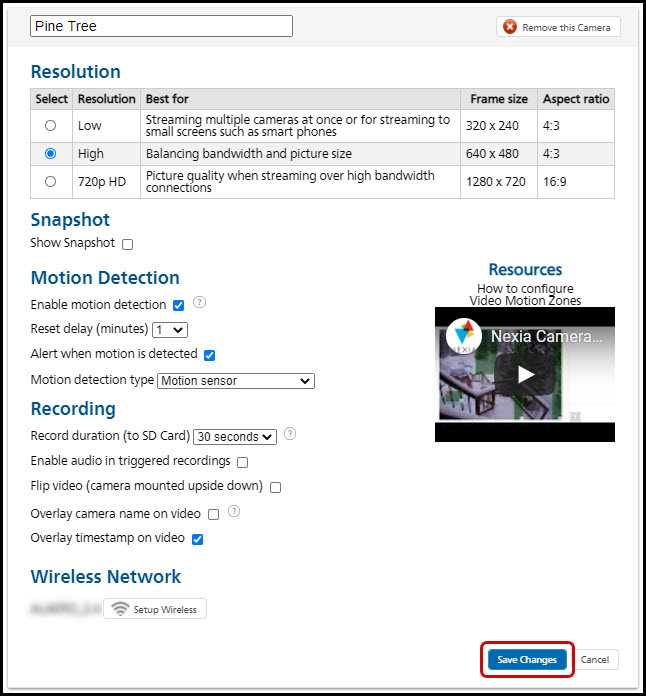
- Locate the camera in the list and select Edit Settings.
- Locate Enable Motion Detection. If there is a blue checkmark in the box, motion detection is already enabled. If not, click the box to enable it.
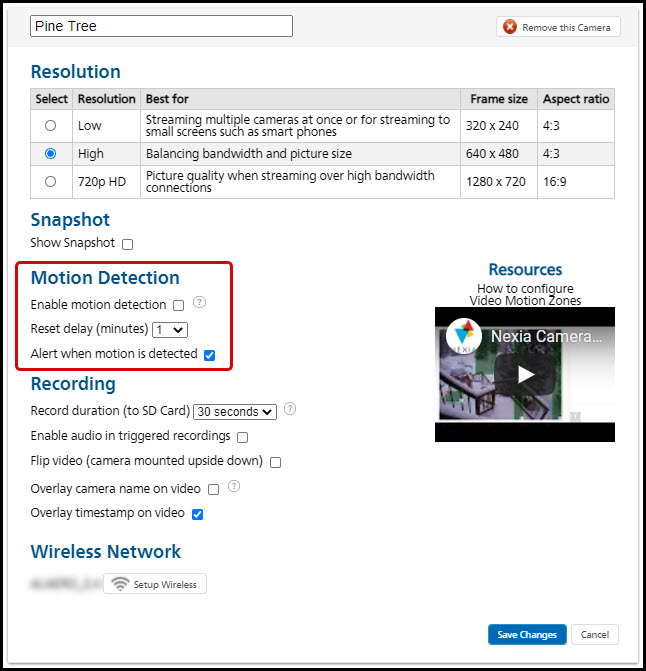
- Use the drop-down box to select the desired motion detection type.
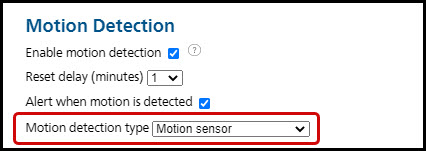
NOTE: If you choose motion detection with zones, you will need to take additional steps at this point. Please refer to Using Motion Zones for more information. - Press Save Changes when done.
-
-
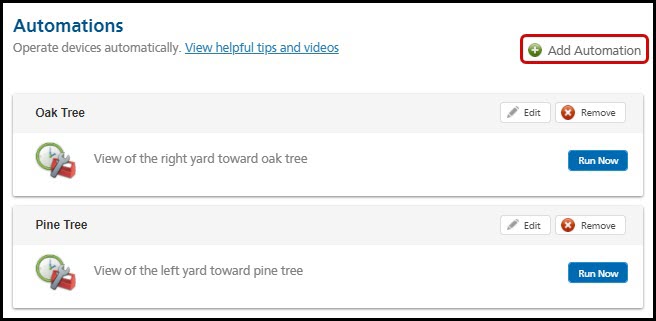
Access the Automations section of the portal. Click the Automations tab in the blue menu at the top of the page. Any Automations you have already created will be displayed in this section.

-
Create an Automation to record video.
-
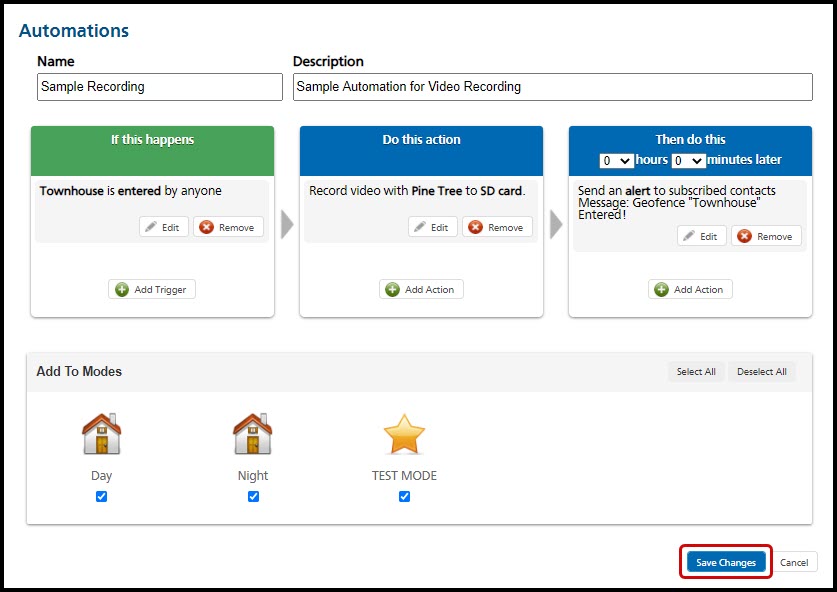
The following is an example of how to use Automations to control video. Assume you want the automation to perform this operation: When a family member enters the "Townhouse" Geofence, the "Pine Tree" Camera will record to SD card.
-
NOTE: This is just an example. Your options in the following processes will be determined by the devices you have installed in your home and their settings.
-
- On the Automations page, click Add Automation.
- Enter a name for your Automation, and if desired, a description.
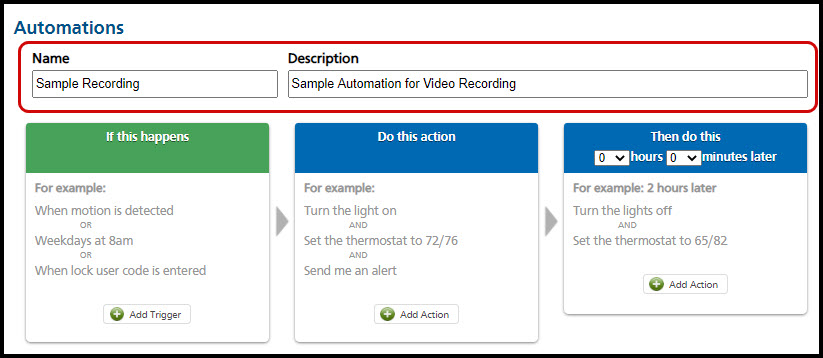
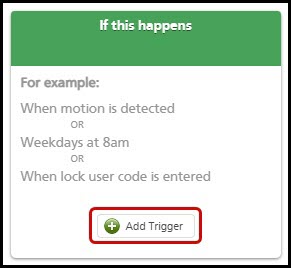
- Locate If This Happens, and select Add Trigger.
-
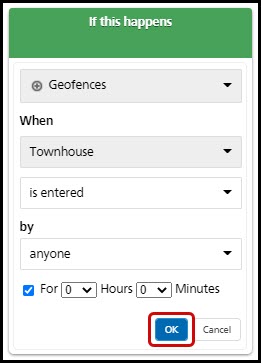
- Select the type of device you want to act as the trigger, the specific device you want to act as a trigger, and the action that will act as the trigger. In this case, we have chosen the category Geofences, device Townhouse, and "is entered" "by anyone" as the action.
- Apply a duration, if desired. In this case, we will choose 0 hours and 0 minutes so the Automation will trigger immediately when someone enters the Geofence. If you want to delay the automation, change the hours and minutes to suit your needs.
- Press OK.
-
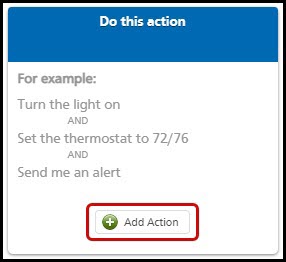
- Locate Do This Action and press Add Action.
-
-
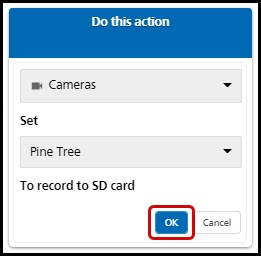
- Select the type of device that will perform the action, the specific device that will perform the action, and whatever specific action you want it to perform. In this case, we have chosen the category Cameras, device Pine Tree, and the action "record to SD card." You may have other options for actions depending on your camera.
- Press OK.
-
-
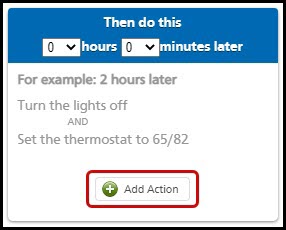
- If you want the Automation to perform an additional action later, locate the Then Do This section and press Add Action.
-
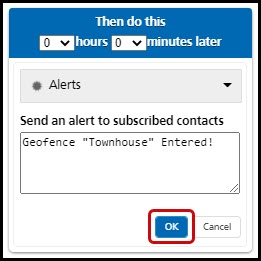
- Apply a delay if desired using the hour and minute drop-downs, and once again select the type of device, the specific device, and the action you want it to perform. In this case, we have chosen to send an alert to subscribed contacts that someone entered the Geofence.
- Press OK.
-
- When complete, press Save Changes.
- For additional information on Automations, please see Automations Overview.
- On the Automations page, click Add Automation.
-
NOTE: When video recording is triggered from Automations, up to 9 seconds of buffered video prior to the triggering event is included in the recording. In most cases, this will capture the triggering event. However, in the case of a fast-moving triggering event (such as a bird flying near the camera) combined with low WiFi bandwidth, it is possible that a triggering event will not be captured in a video frame.
Record Manually
You can manually record video at any time from either the American Standard web portal or the mobile app.
Web Portal
- Log into the American Standard Home web portal.
- If you have multiple homes, select the home where your camera is installed.

- Select Video from the blue menu on the left side of the page.

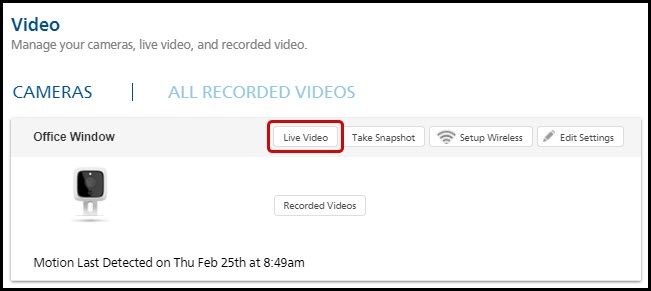
- Locate the camera in question and click Live Video.
- Start recording by clicking the round (Record) button in the lower-left corner of the video window.
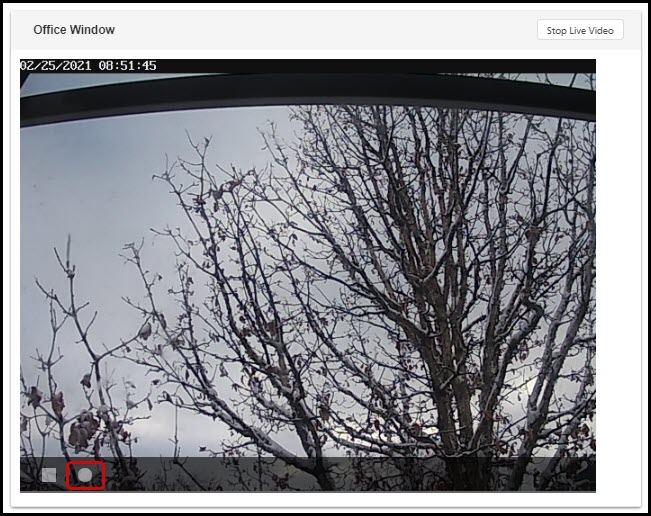
NOTE: If you do not see the button, hover your mouse pointer over the window to bring up the controls. - Stop recording and exit Live Video by clicking the square (Stop) button in the lower-left corner of the video window.
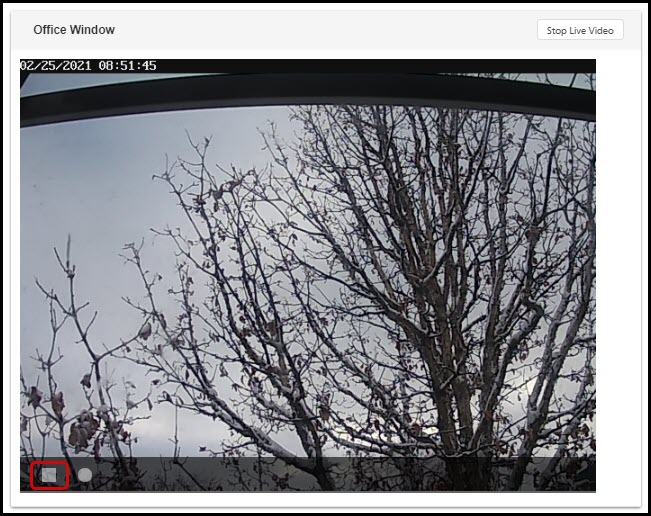
NOTE: If you do not see the button, hover your mouse pointer over the window to bring up the controls.
Mobile App
- Log into the American Standard Home mobile app.
- If you have multiple homes, select the home where your camera is installed.

- Locate the camera in question on the dashboard and click Show Video.
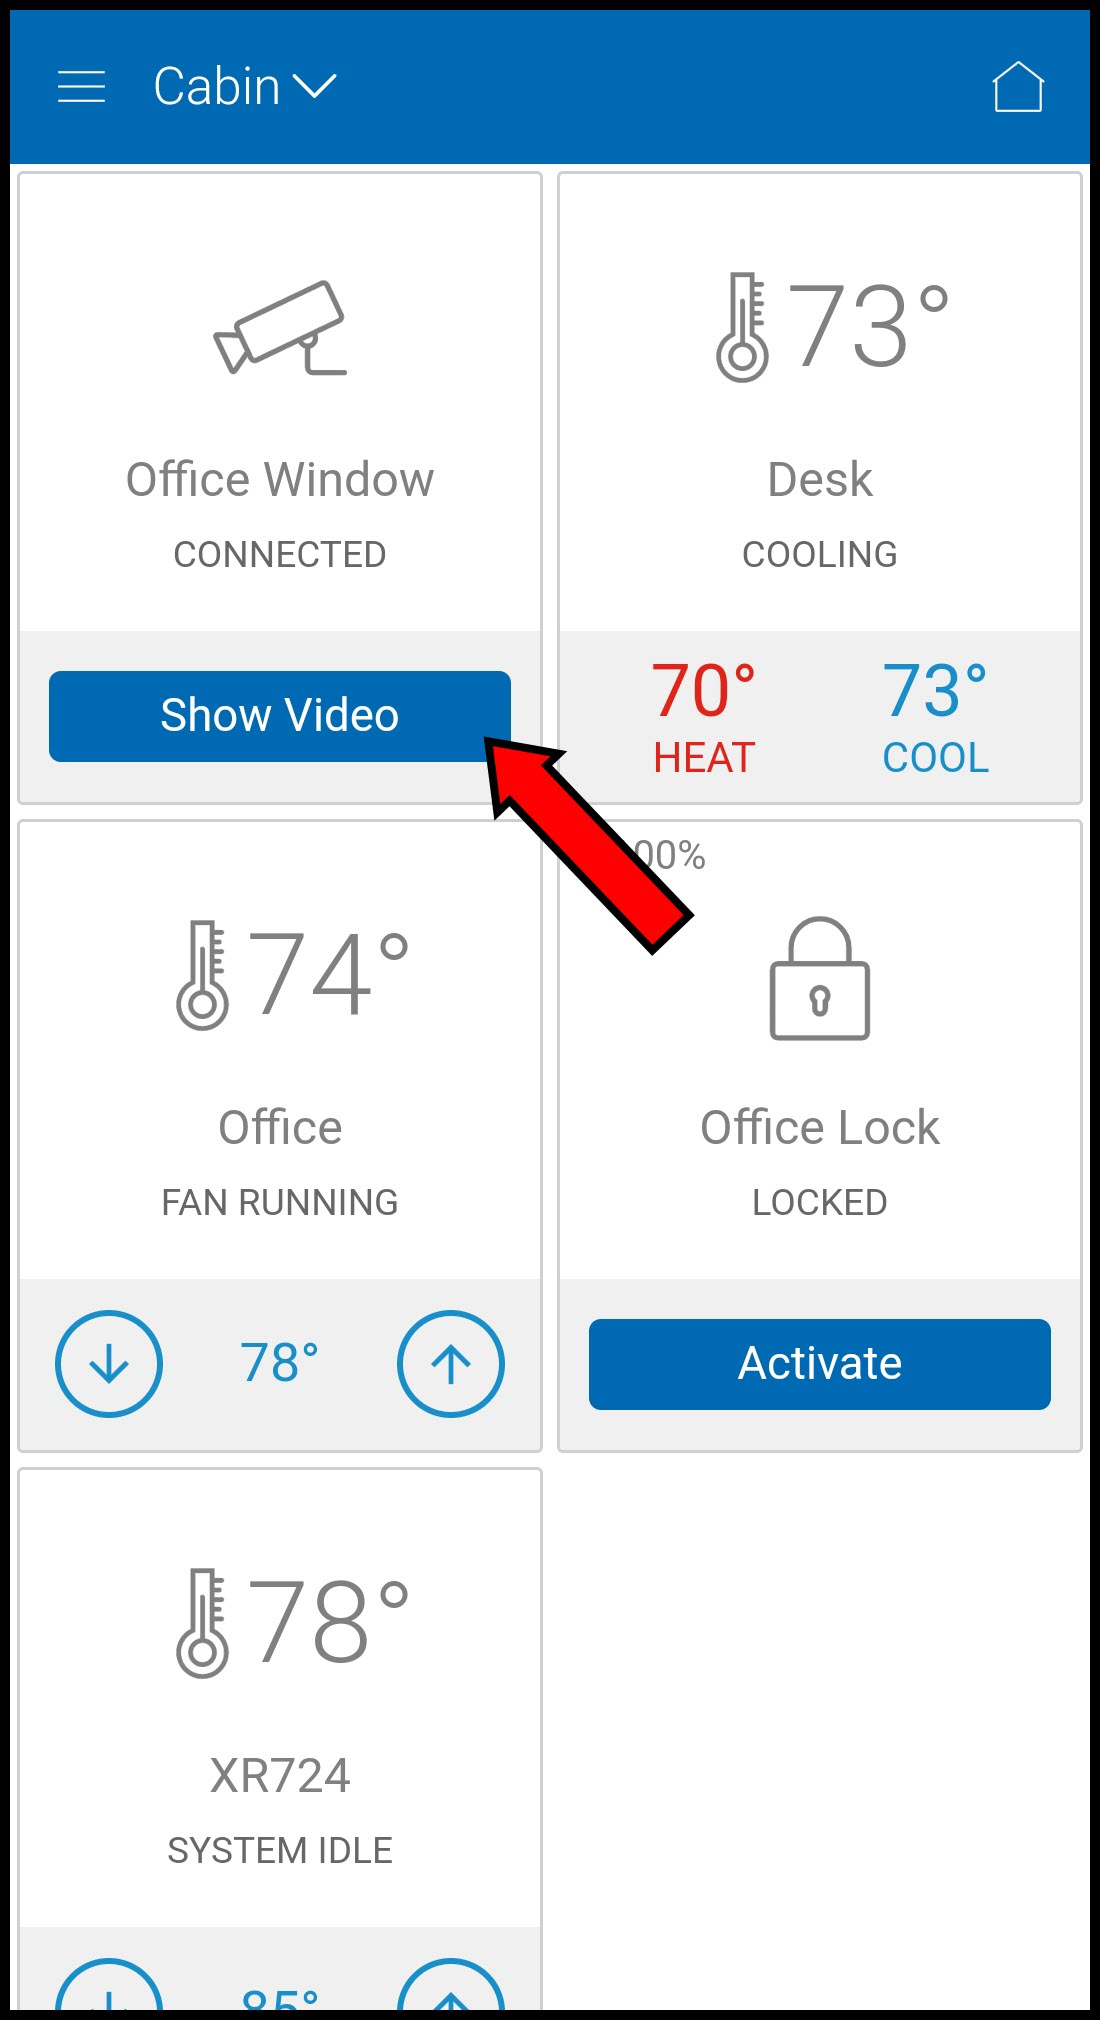
- Start recording by tapping the round (Record) button in the lower-left corner of the video window.

NOTE: If you do not see the button, tap inside the video window to bring up the controls. - Stop recording and exit live video by tapping the square (Stop) button in the lower-left corner of the video window.

NOTE: If you do not see the button, tap inside the video window to bring up the controls.
If you have any questions or need assistance, please contact American Standard Home Customer Support via email at help@asairhome.com or call 1-877-374-0697, Monday-Friday 9 AM – 8 PM ET, and Saturday 10 AM – 5 PM ET.
Comments
0 comments
Article is closed for comments.